 Post by
 Rooftop HVAC unit crane placement is the process of using a mobile crane to lift a new or replacement HVAC unit, chiller, or other mechanical equipment onto a building’s roof and set it precisely on its curb or frame. A safe, efficient lift comes down to six steps: site assessment, crane selection, lift planning, setup, the lift itself, and final set and disconnect. Here’s how each step works and what contractors and facility managers should have ready before the crane arrives.
Step 1: Assess the Site and the Load
Every rooftop lift starts with information. Before a crane is recommended, the lift team needs to know the unit’s weight and dimensions, the height and distance from where the crane can set up to where the unit will land, and what’s around the building.
What to Gather Before You Call
- The unit’s make, model, and shipping weight, including any attached accessories or curb adapters.
- The roof height and the horizontal distance from the crane’s likely setup spot to the roof curb.
- Ground conditions at the setup location, including pavement, soil, slopes, and underground utilities.
- Overhead obstructions such as power lines, tree limbs, canopies, or adjacent structures.
- Access for the crane and any delivery truck, including gate widths, turning radius, and parking lot layout.
The weight of the unit is only part of the equation. The farther a crane has to reach, the less it can safely lift, so a lighter unit at a long reach can require a larger crane than a heavier unit set close to the boom.
Step 2: Choose the Right Crane
Crane selection is based on the load chart, which shows how much a specific crane can lift at a given boom length and radius. For most commercial rooftop work, a truck crane or all-terrain crane provides the reach and capacity needed while staying mobile enough to set up in a parking lot or alley. Smaller rooftop units on low-rise buildings may be handled by a smaller mobile crane, while large chillers or air handlers on taller buildings call for more capacity and a longer boom.
A good rule of thumb is that the crane’s chart capacity at your working radius should comfortably exceed the total load, which includes the unit, rigging hardware, and hook block. A reputable crane company runs these numbers for you, which is why accurate site details up front matter. Our team covers the full range of equipment on our crane rental page, including truck, rough terrain, all-terrain, and tower cranes.
Step 3: Build the Lift Plan
For anything beyond a routine small lift, a written lift plan documents the crane, load, rigging, setup location, and exact path of travel. It also sets out who is responsible for what during the lift. A solid plan includes the load weight and rigging weight, the crane configuration and chart capacity at the working radius, the setup and outrigger locations, the swing path, and the exclusion zone on the ground below.
Lifts with unusual shapes, tight clearances, or nearby live equipment may call for specialized rigging to keep the load balanced and controlled all the way to the roof.
Step 4: Set Up the Crane and Prepare the Roof
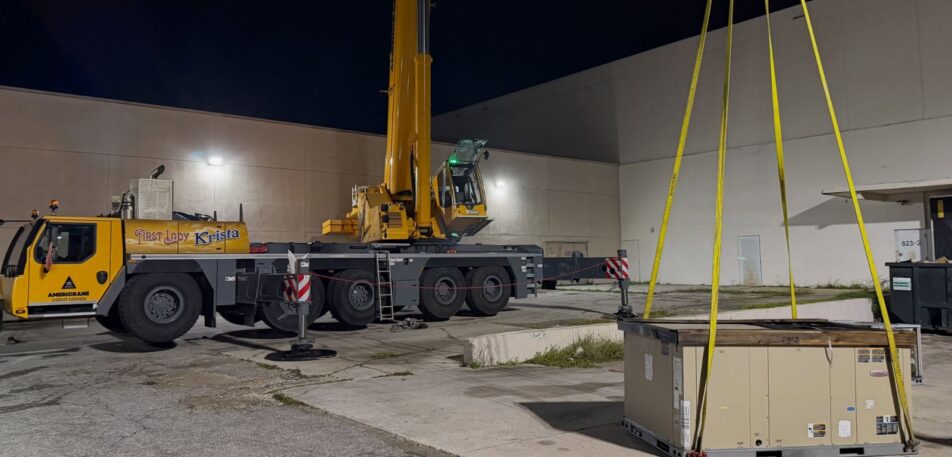
On the day of the lift, the crane is positioned, leveled, and set on its outriggers. On soft or uneven ground, crane mats spread the load so the crane stays stable under weight. At the same time, the roof crew prepares the landing area by confirming the curb or frame is ready, clearing the work zone, and verifying that the existing unit has been disconnected, drained, and made safe for removal.
If the unit is arriving by truck rather than being stored on-site, timing matters. Coordinating delivery so the unit arrives when the crane is ready avoids costly standby time. Our trucking services can handle transport and staging alongside the lift itself.
Step 5: Make the Lift
The lift itself is usually the shortest part of the job. A certified operator works with a qualified rigger and a signal person, who communicates between the roof crew and the operator throughout. The load is rigged, lifted a few inches for a brief check of balance and rigging, and then raised, swung, and lowered into position slowly and deliberately. If a replacement is happening, the old unit typically comes off first and is set down in a designated staging area before the new unit goes up.
Step 6: Set, Secure, and Release the Crane
Once the unit is over the curb, the operator lowers it gently while the roof crew guides it into alignment. The unit is confirmed seated and secured before rigging is disconnected and the crane is released. Utility hookups, ductwork, and commissioning are handled afterward by the HVAC crew, which is why coordination between the mechanical contractor and the crane company matters, particularly when the crane is on a timed rental.
Common Mistakes to Avoid
- Underestimating the working radius, which can lead to a crane that’s too small for the lift.
- Skipping a ground-bearing check, which risks outrigger settlement or instability.
- Overlooking overhead power lines, which require specific clearance distances.
- Booking the crane before the unit’s actual weight and dimensions are confirmed.
- Failing to coordinate the HVAC crew’s disconnect and reconnect schedule with the crane window.
Plan Your Rooftop Lift With a Crane Partner
Americrane handles HVAC and mechanical lifts for commercial, industrial, and institutional buildings across Texas and Florida, with certified operators and equipment sized to the job. To get started, contact our team with your unit specs, building height, and preferred lift date, and we’ll recommend the right crane and walk you through the plan.
For the federal safety requirements that govern every crane lift, OSHA’s cranes and derricks in construction standard sets out operator, rigging, and power line clearance rules. The National Commission for the Certification of Crane Operators also publishes information on operator certification, and the ASHRAE website is a useful reference for HVAC equipment standards and guidance.
Frequently Asked Questions
How much does a rooftop HVAC unit weigh?
It varies widely. Small packaged rooftop units can weigh a few hundred pounds, while large commercial units, air handlers, and chillers can weigh several thousand pounds or more. Always confirm the exact shipping weight from the manufacturer’s specifications before booking a crane.
What size crane do I need to lift an HVAC unit onto a roof?
It depends on the unit’s weight, the roof height, and how far the crane must reach. Crane capacity drops as the boom extends, so the right crane is determined by the load chart at your specific working radius, not by the weight of the unit alone.
How long does a rooftop HVAC crane lift take?
The lift itself is often completed in a couple of hours for a single unit, but crane setup, rigging, and breakdown add time. Most jobs are scheduled as a half-day or full-day rental, depending on how many units are being replaced.
Do I need a permit for a crane lift on a commercial building?
It depends on the municipality and the site. Lifts that require lane or street closures, sidewalk blocking, or work in public right-of-way commonly need a permit. Your crane company can help identify what’s required for your location.
Can a crane lift an HVAC unit in tight or urban locations?
Often, yes. Mobile cranes can set up in parking lots, alleys, and other limited spaces, and the right crane type and lift plan can work around tight access. The setup location, ground conditions, and overhead clearances determine what’s possible.
What should I have ready before requesting a crane quote?
The unit’s weight and dimensions, the building height, the distance from the crane setup spot to the roof curb, ground conditions, and your preferred lift date. The more detail you provide, the more accurate the quote and equipment recommendation will be.
Does Americrane handle rooftop HVAC lifts?
Yes. Americrane provides crane support for HVAC and mechanical lifts, including rooftop units and chillers, for commercial, industrial, and institutional projects across Texas and Florida.